Feb 21, 2014 - Installing a Fahrenheat FUH54 Electric Garage Heater
The Old Heater
I bought this 4000W Cadet "Hot One" heater shortly after we finished
building our garage in 2001. It was really undersized for my 24'x28'
garage, but once I closed off the attic space with a new stairwell, it
could keep the garage in the mid 60's while I worked. I only used it a
few times a year when I was working out in the garage, so it lasted me
more than 12 years.
I would blow the dust out of it every now and then with the shop vac,
but did have to take it apart and lubricate the fan at one point. In
recent years the fan bearings were getting really noisy, so when the
thermostat quit working recently, I decided it was time to buy a new
heater.
Preparing the Wiring
After a little research, I chose a new
Fahrenheat FUH54 garage heater. At 5000 watts, it is still
undersized for my 24' x 28' garage, but it will provide more heat than
my old heater did.
Fahrenheat makes a 7500 watt model also, but I would have had to run
new wiring for that one. The existing wiring already had 10/3 cable, so
the FUH54 was the obvious choice. I did have to replace the existing
breaker with a new 30amp breaker.
The Cadet heater sat on the floor, and I had a receptacle it plugged
into next to my attic stairs. To keep things simple, I mounted a new
box up near the ceiling and fished a short piece of 10/3 cable between
the old and new boxes.
Garage Wiring Finished
After reading several reviews, I decided to use a clothes dryer cord to
connect the heater. It is affordable, readily available, and lets me
take the heater down easily for cleaning or maintenance.
To keep the installation tidy, I mounted a dryer receptacle in the new
box up near the ceiling. Then I installed a heavy duty 30A switch in
the old receptacle box near the floor.
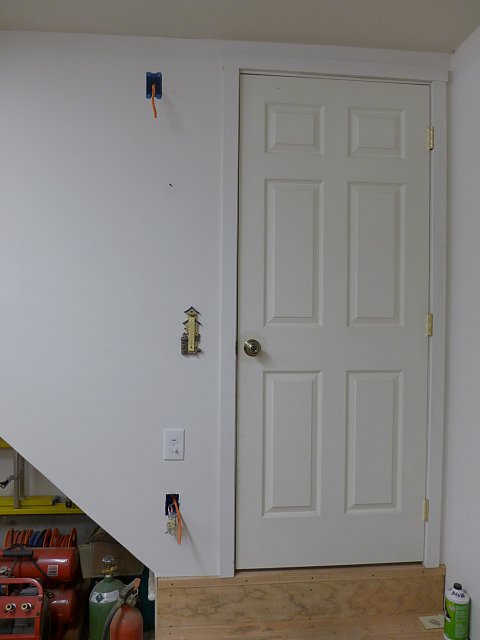
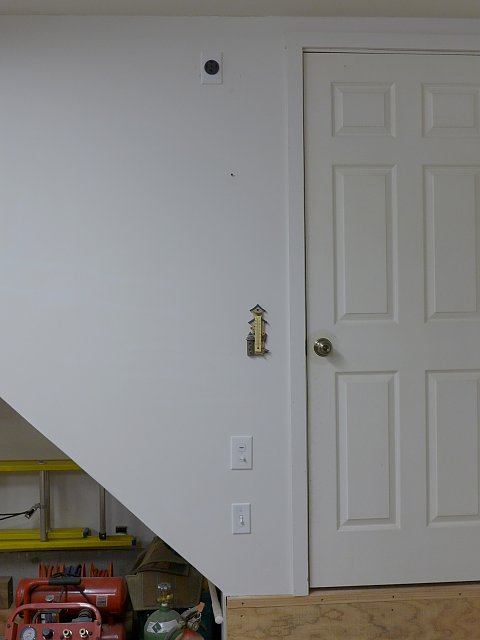
Rewiring the Thermostat
While I can reach the thermostat on the heater by standing on the lower
step, I thought a switch on the wall would be more convenient for
turning the heater on and off. I was originally going to install a line
voltage thermostat, but when I got to the store I saw they had large
openings at the top and bottom. I figured that was just one more thing
to collect dust. Once the thermostat is set, all I really need to do is
turn the heat on and off. The switch works fine for that, it was half
the cost, and I don't have to worry about dust getting in it.
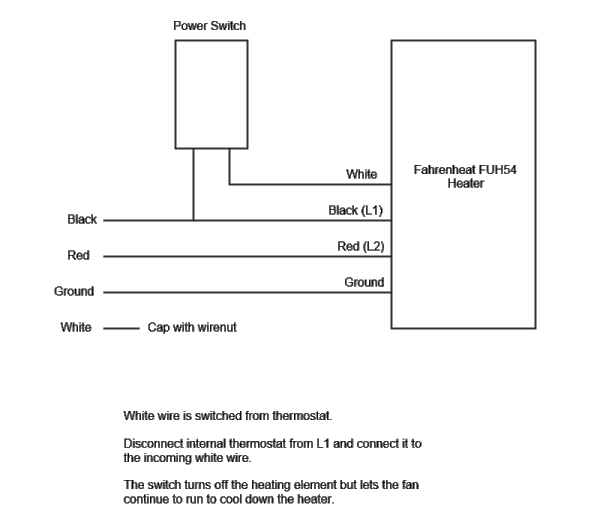
The FUH54 heater is designed so the fan keeps running after it is
turned off to cool off the heating element. I kept this feature by
turning the unused white wire into a switched lead for the element. The
fan is still wired full time to keep the original cooling feature.
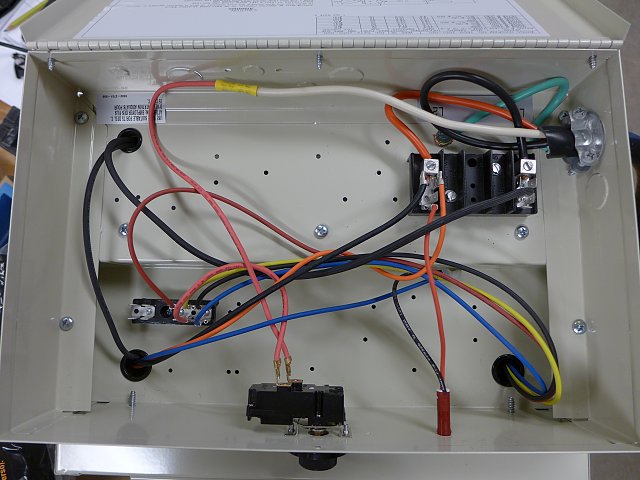
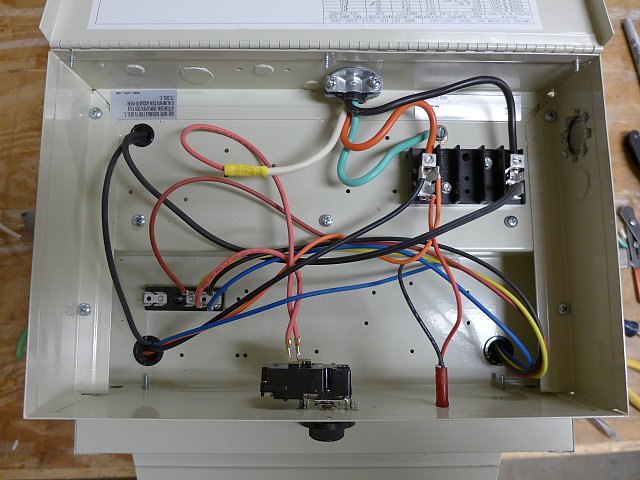
Rewiring the Heater
Inside the heater, I lifted the thermostat wire that connected to L1,
and connected it to the new switched white wire.
I needed a 3/4" cable clamp to accommodate the dryer cable, but the
FUH54 only has one 3/4" knockout on the left side. That puts the
incoming cable rather close to the terminal block, but it still works
out OK.
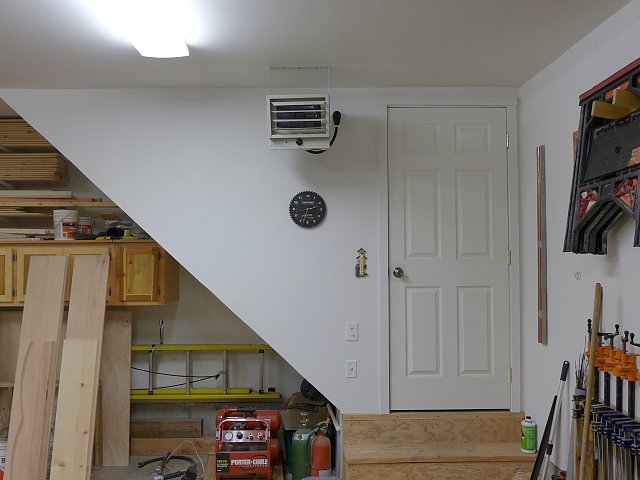
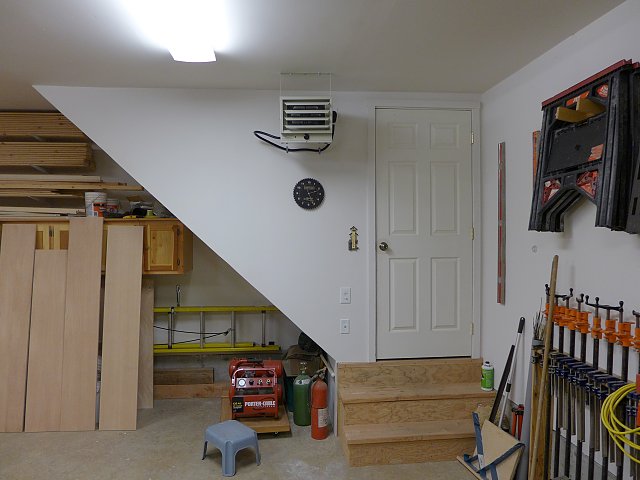
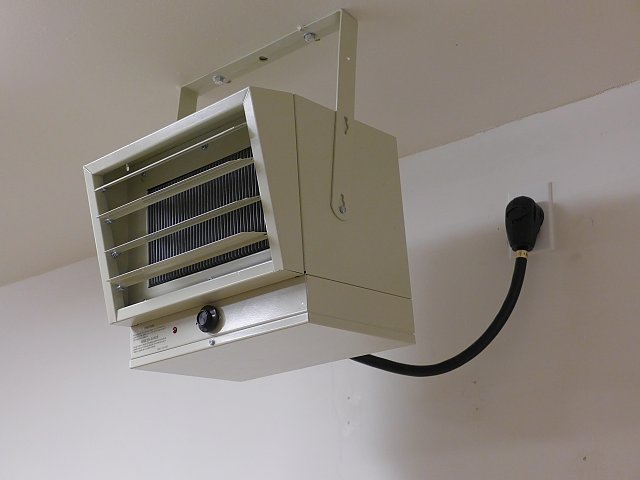
The Installed Heater (Temporarily)
I located the ceiling joist, and mounted the heater bracket to the
ceiling with the supplied lag bolts. Then it was easy to lift the
heater up, hook it into the bracket slots, and secure the bolts.
Finally, I have heat again!
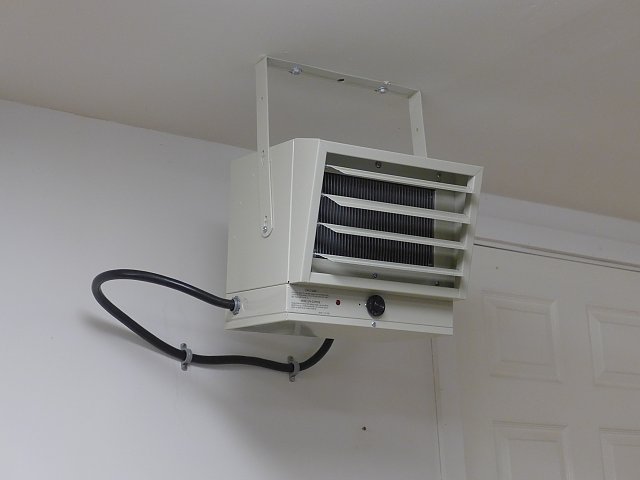
The Cord Issue
Because the FUH54 only had a 3/4" knockout on the left, it meant the
cord had to loop around the back of the heater to reach the outlet on
the right. It worked fine, but visually it drove me crazy.
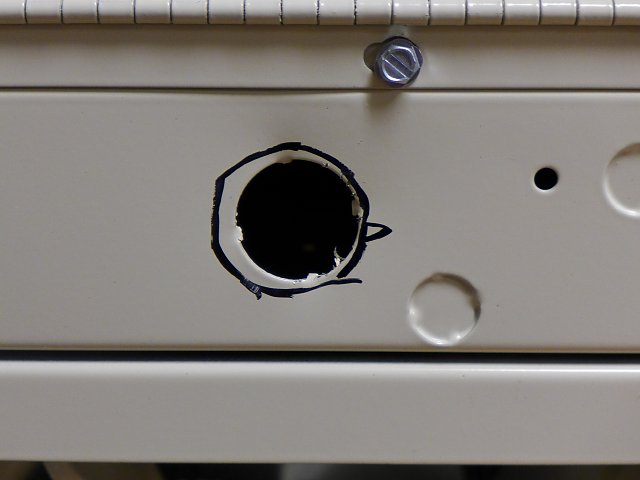
Relocating The Power Cord
I decided to move the power cord to the back of the heater, to one of
the knockouts in the center. Unfortunately, that was only 1/2" and I
needed 3/4".
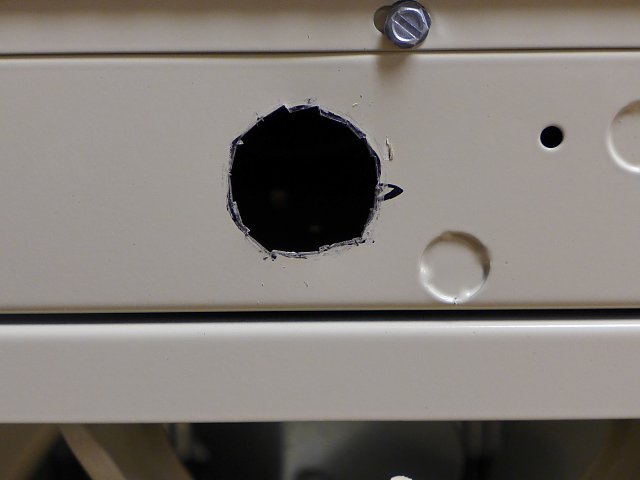
Enlarging the Knockout
Ideally, I would have preferred to use a knockout punch to make the
hole bigger. But I wasn't going to spend $40-60 on a punch I'm probably
never going to use again. A step drill might have worked, but those
were almost as expensive. Filing and hole saws seemed like too much
work, and I was worried about metal shavings falling into the
heater.
Thankfully, I had a metal nibbler that worked great for enlarging the
knockout hole. I have had my nibbler for over 25 years since my days
working with electronics, but I see they are still available today from
Amazon.com.
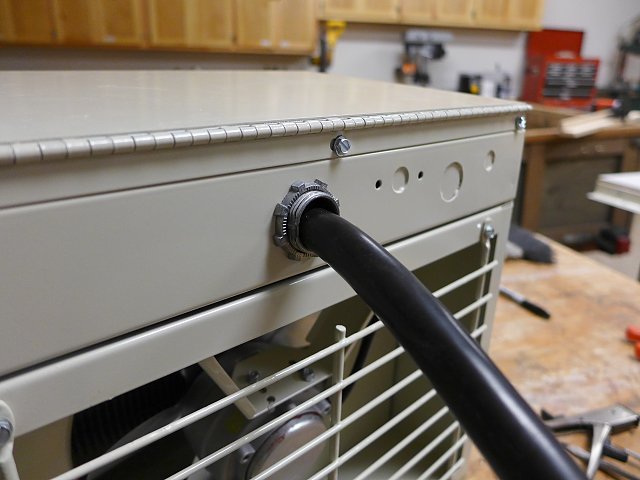
Reinstalling the Cord
The nibbler leaves a fairly jagged hole, but once the cable clamp is
mounted you can't tell it's not a factory knockout.
Rewiring the New Cord
Once the new cord was installed, I could make all the connections.
Moving the cord to the back middle also eliminated the crowding around
the terminal block.
Remounting the Heater
With the wiring completed, it was a simple matter of hooking the heater
back on the bracket and plugging in the cord.
Finished!
The shorter cord in the back makes for a much neater installation. I am
just happy to have heat again.